 When we got Pyxis the speedo impeller was located in the forward dinette seat locker. On the bottom it was beside the keel about 2 feet aft of the leading edge. Besides occupying some prime storage space in the locker the impeller was affected by the different speed of water flowing over the keel on different tacks when closer to the wind then a beam reach. When sailing close to the wind there is leeway angle. This means the boat is moving sideways a bit. A leeway angle makes water flow over the windward side of the keel faster. This is how the keel provides lift. Because of this the knotmeter would read high on port tack and low on starboard. I decided to move the impeller to a location under the v-berth and about 18" ahead of the keel, close to the centerline.
Re-Locating the Speedo Impeller
 I relocated the speedo impeller from the forward dinette seat locker to the v-berth locker. First I made a fiberglass backing plate with 6 layers of mat and West System epoxy. I sanded the inside surface of the hull to remove paint and provide a rougher surface for the epoxy to bond to. I drilled through the whole thing for the speedo impeller mounting. The thru-hull is a bronze fitting made to mount flush with the hull. I drilled a pilot hole from the inside to get proper position in the middle of the backing and drilled the rest from the outside. I started with a hole saw the same diameter as the flange on the thru-hull. I cut in about 1/16" with this. I switched to a hole saw the same diameter as the shoulder of the bronze fitting and cut in about 1/4". I switched to a hole saw just larger then the threaded part of the thru-hull and cut all the way through the hull and backing plate. The hull here is about 1/2" thick and the backing of 6 layers of mat is about another 1/4".
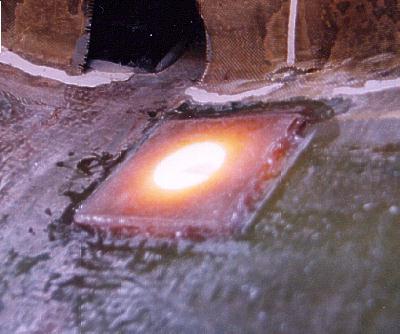
 After I cut the holes with the hole saw I shaped it to receive the thru-hull flush with the deck. I used a Dremel tool with a sanding drum attachment. This is a VERY effective tool for this purpose. In a few careful minutes I had the thru-hull fitting a bit deeper then flush. I mixed some epoxy with fairing additive. I applied it to the outside of the thru-hull and to the inside of the hole in the hull. I inserted the thru-hull and put a block of wood covered with wax paper against it to hold it flush with the hull. There was a little wiggle room for the thru-hull. I held the board up on the hull with a spring loaded curtain rod. From the inside I filled around the thru-hull with more epoxy using a syringe. I worked the thru-hull around to better spread the epoxy. I added silica to thicken the epoxy and topped off the hole around the fitting. I thickened it to keep it form running out on the slightly slanted surface.
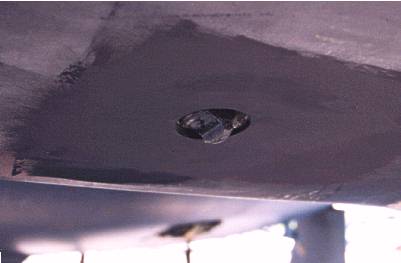 The finished mounting required a bit of epoxy on the outside to even it up with the hull and some bottom paint.