 Deck Description
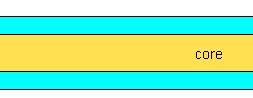
The deck of the Pearson 26 is balsa cored. There is an inner and outer fiberglass skin. The fiberglass skins are about 1/4-3/8" thick and the balsa core is about 1/2" thick. This type of construction has several advantages over a solid fiberglass lay-up. It is stiffer than the solid glass lay-up and provides insulation. The disadvantage is that the construction technique requires more care from the builder to get it right. It is also more susceptible to damage from water leaks. When water gets into the core it degrades the bond between the core and the skin. It is therefore important to properly seal hardware mounting holes to insure that water doesn't find it's way into the core. You also need to reinforce the deck area where the hardware is mounted, otherwise the core will be squished when the mounting bolts are tightened. This can also lead to delamination.
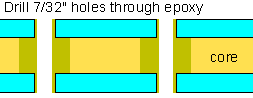
 Step 1
The first step is to drill the mounting holes for the hardware. I drill holes 1 to 2 sizes larger then the mounting bolts. For 1/4-20 bolts I drill 9/32 holes. The holes are drilled straight through the entire deck. There is a little margin for error in this step and the holes don't have to be perfect. You want to be careful not to chip the gel coat and surface of the skin inside the boat. Fiberglass and balsa are disconcertingly easy to drill through so I take this step slowly.
 Step 2
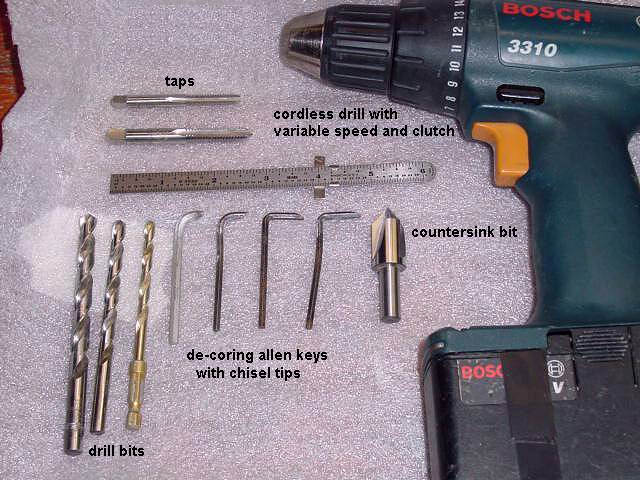
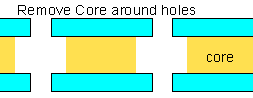
Next I remove the core material around the holes. I use a variety of tools for this. I have a series of allen keys on which I have cut a chisel shaped end. I chuck these in my cordless drill and chew out the balsa. I set the clutch on the drill so I can't over torque the tool. I start with a short one and work up to a long one that removes about one inch from the edge of the hole. This provides space for the epoxy I will add to reinforce and seal the deck.
Photo of de-coring tools
 Step 3
I fill the now enlarged holes with West System epoxy. I usually add a little silica filler (apr. 1 teaspoon/pump stroke of west system) to the epoxy because it helps minimize bubbles. Sometimes I add a high strength filler (#404) to the epoxy. I put tape over the bottoms of the holes to contain the epoxy. I generally use a fairly thin mix for the first application so it will be better absorbed by the balsa around the hole and if the mix is too thick you could more easially get voids. It may take more than 1 application because the core may soak up a lot of epoxy.
 Step 4
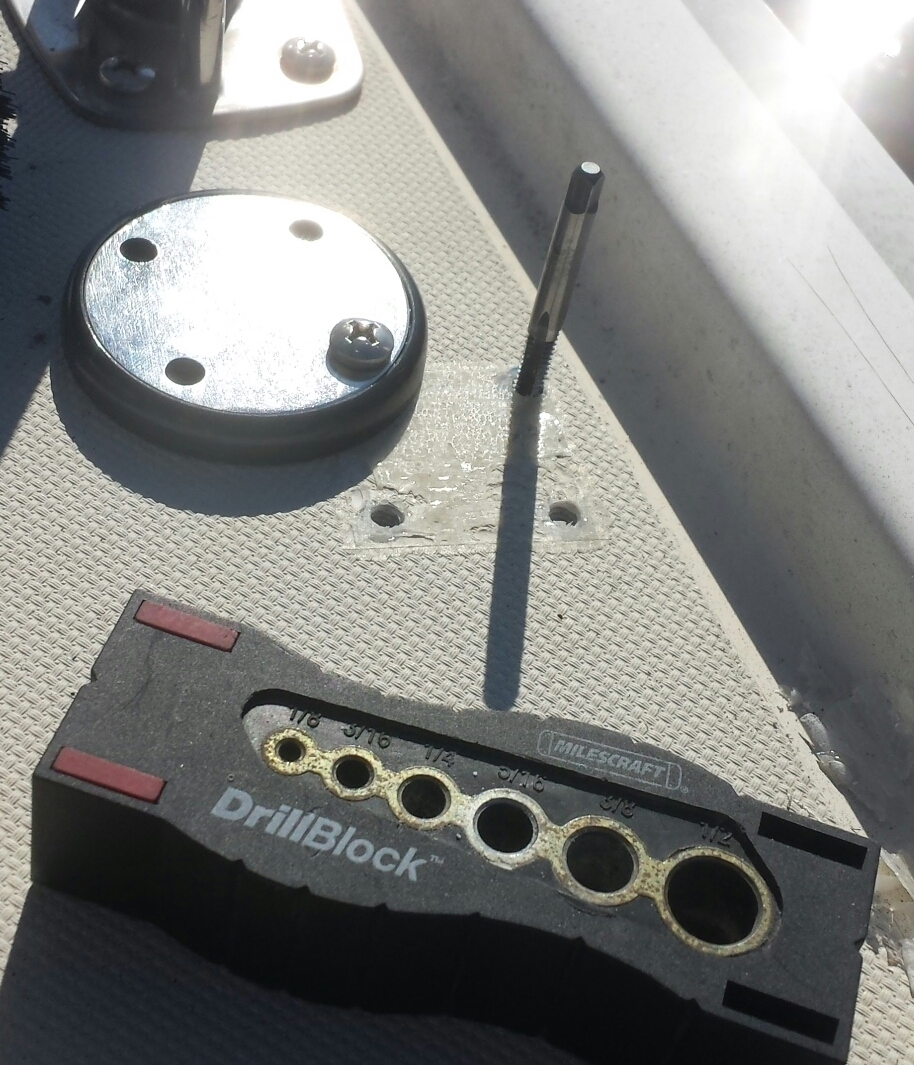
After the epoxy has set I drill 7/32" holes through it. It is important to have the correct spacing for the holes and they must be perpendicular to the deck. I use the backing plate as a template to drill the holes. I drill one hole then use a smaller bolt (10-24) to fasten it to the deck to insure proper alignment for the second hole.
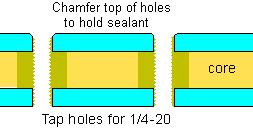 Step 5
I tap the holes for 1/4-20 bolts. The reason I do this is to get the best seal possible and improve the mechanical strength of the mounting. The epoxy is pretty easy to tap. You don't need a super hard tap. An alternative to this is to place waxed bolts (any old wax will do) in the epoxy before it has set. It sets around the bolt which is then backed out leaving perfect threads. The challange with this method is getting a proper allignment of the bolt in the epoxy. I also chamfer the top of the holes with a counter sink bit. This provides a recess to hold sealant and create an o-ring sort of seal.
Photo of de-coring tools including counter sink bit
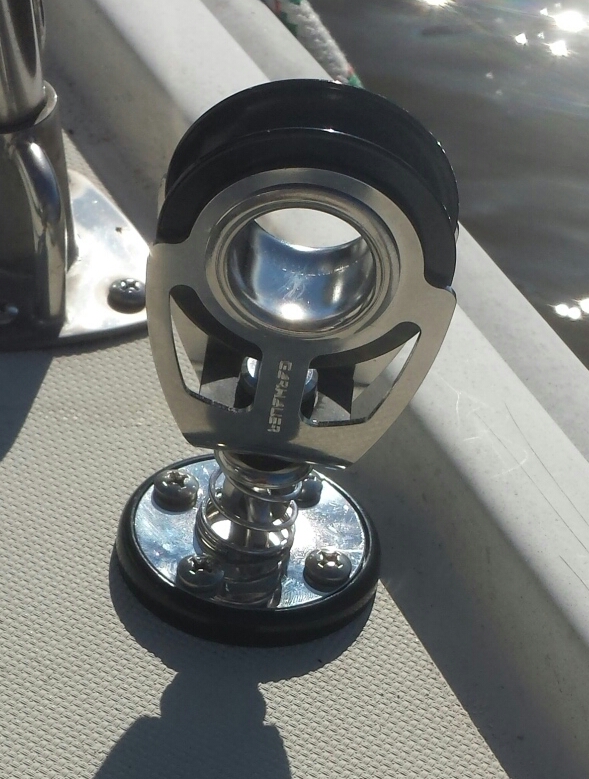
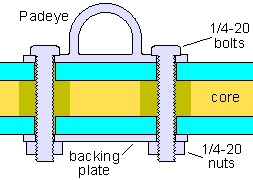 Step 6
I mount the hardware and seal the bolts with Boat-Life Sealer Caulk. I apply the sealer to the upper 3/4" of the threads and to the bottom of the padeye. I screw the bolts down tight then mount the backing plate and nuts on the underside. I need a helper to keep the bolts from turning as I tighten the nuts on the underside. I clean up the excess sealer with a rag wetted with solvent.