|
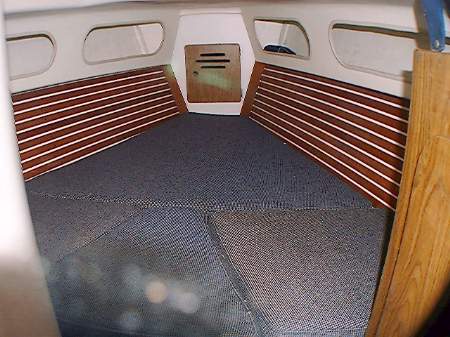
| Pearson 10M V-Berth Trim |
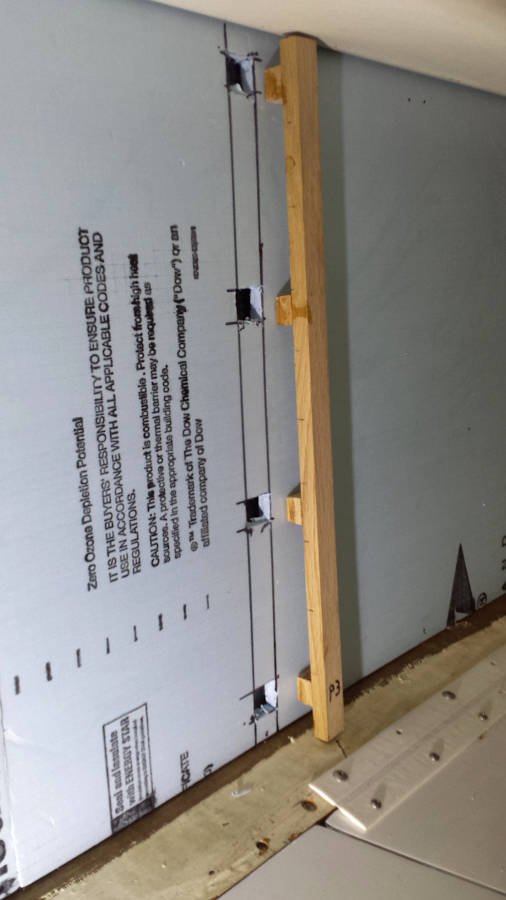
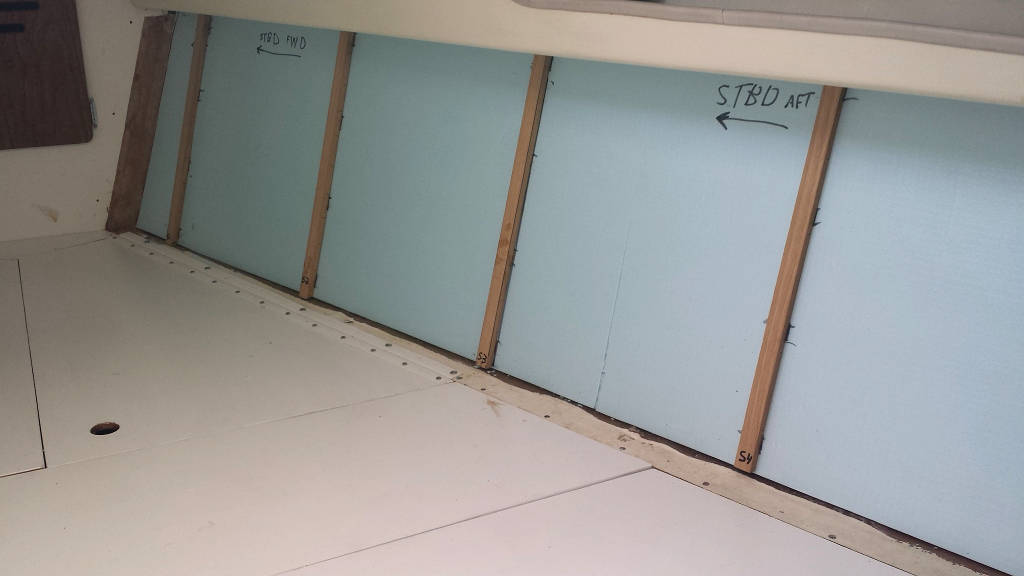
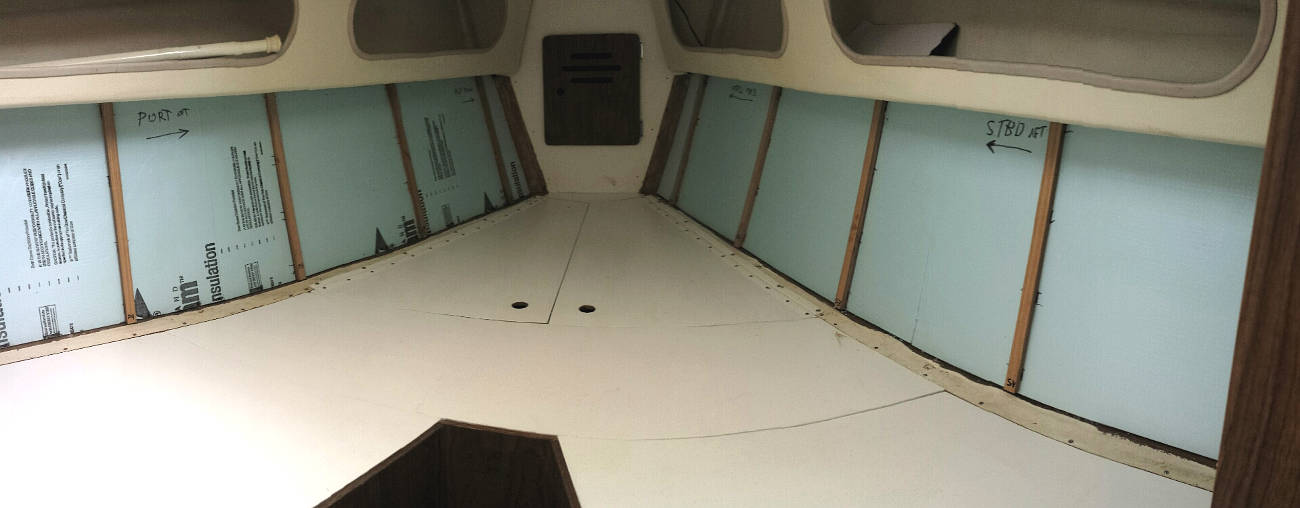
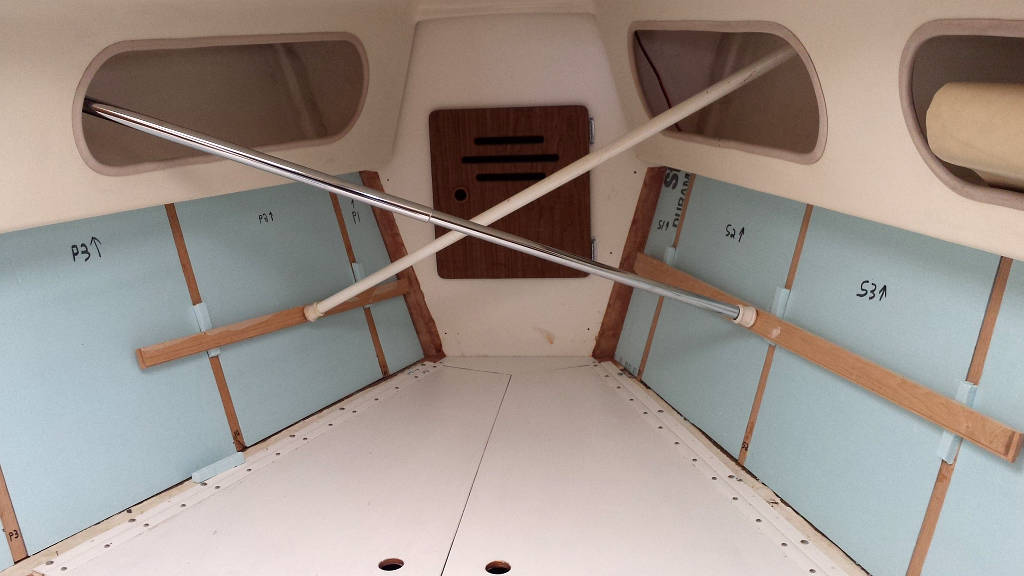
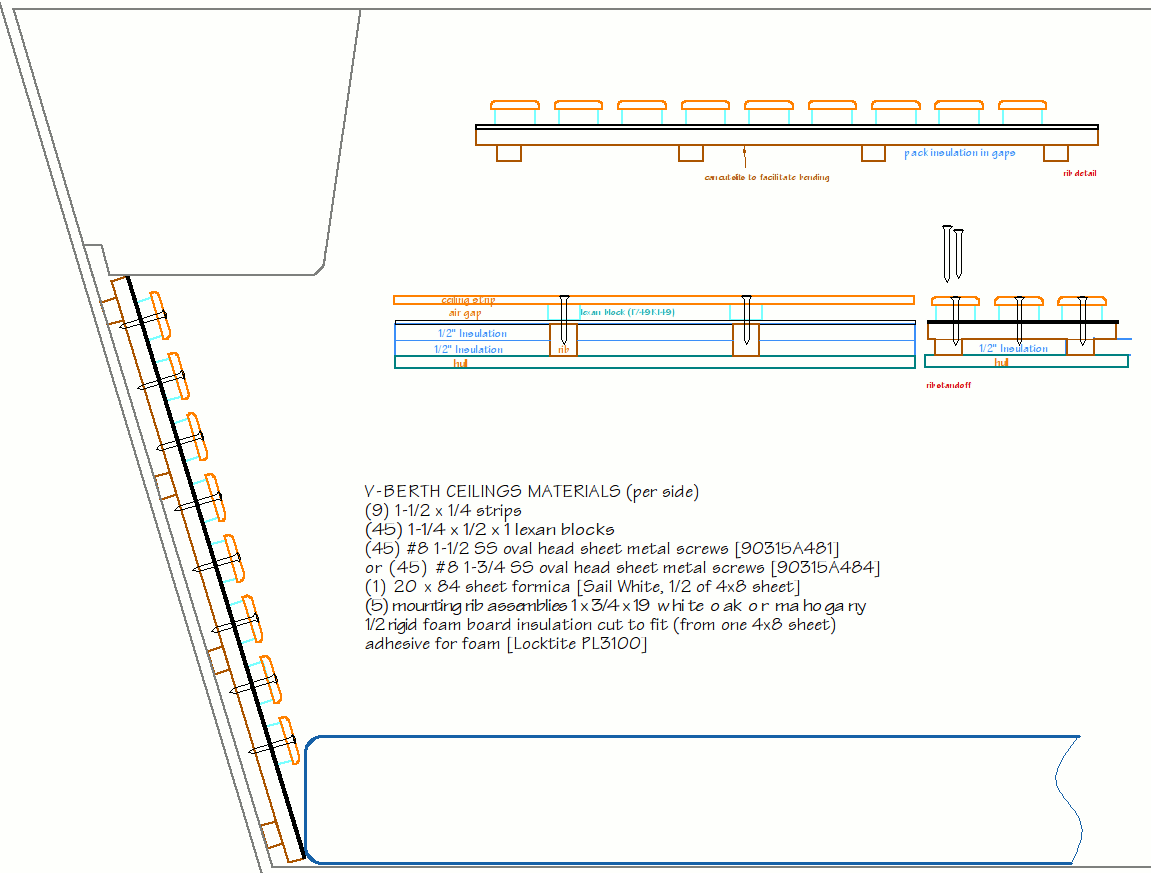
Fist I removed the original plywood with teak strips and peeled the hat ribs from the hull (very easy). Then I cut and fit a 1/2" layer of foam insulation board. I did this in two pieces because I couldn't maneuver a single piece into place because of the geometry. I made some new ribs from 1/2" thick white oak and added small square pieces of white oak onto the ribs. I cut small square holes in the foam board that these squares on the ribs fit into.
I glued the foam to the hull with construction adhesive and then glued the ribs to the hull through the square holes with epoxy. I cut slits in the back of the ribs to make them bend more easily to the shape of the hull. When I glued the ribs in I had some spring poles to press them to the hull until the epoxy set. Then I cut more sections of 1/2" foam board to fit between the ribs for a total of 1" of foam board. That's good for about R5. I glued the foam board inserts to the foam board that was already there.
Over all this goes a layer of white formica. Then the ceiling strips go on and are screwed to the oak ribs with 1/2" standoffs so that air can circulate behind the strips and maybe for some back-lighting.
DHP - July, 2018